The Menu page
What it's for
The Menu is where you manage everything guests can order — your items, the categories they're grouped under, combos, and promotions. What you set here is exactly what appears on the POS and on any online ordering or QR menu.
Where to find it
- Web
- iOS
- Android
Choose Menu in the left sidebar (route /menu).
Open Menu from the app to reach the menu hub.
Open Menu from the app to reach the menu hub.
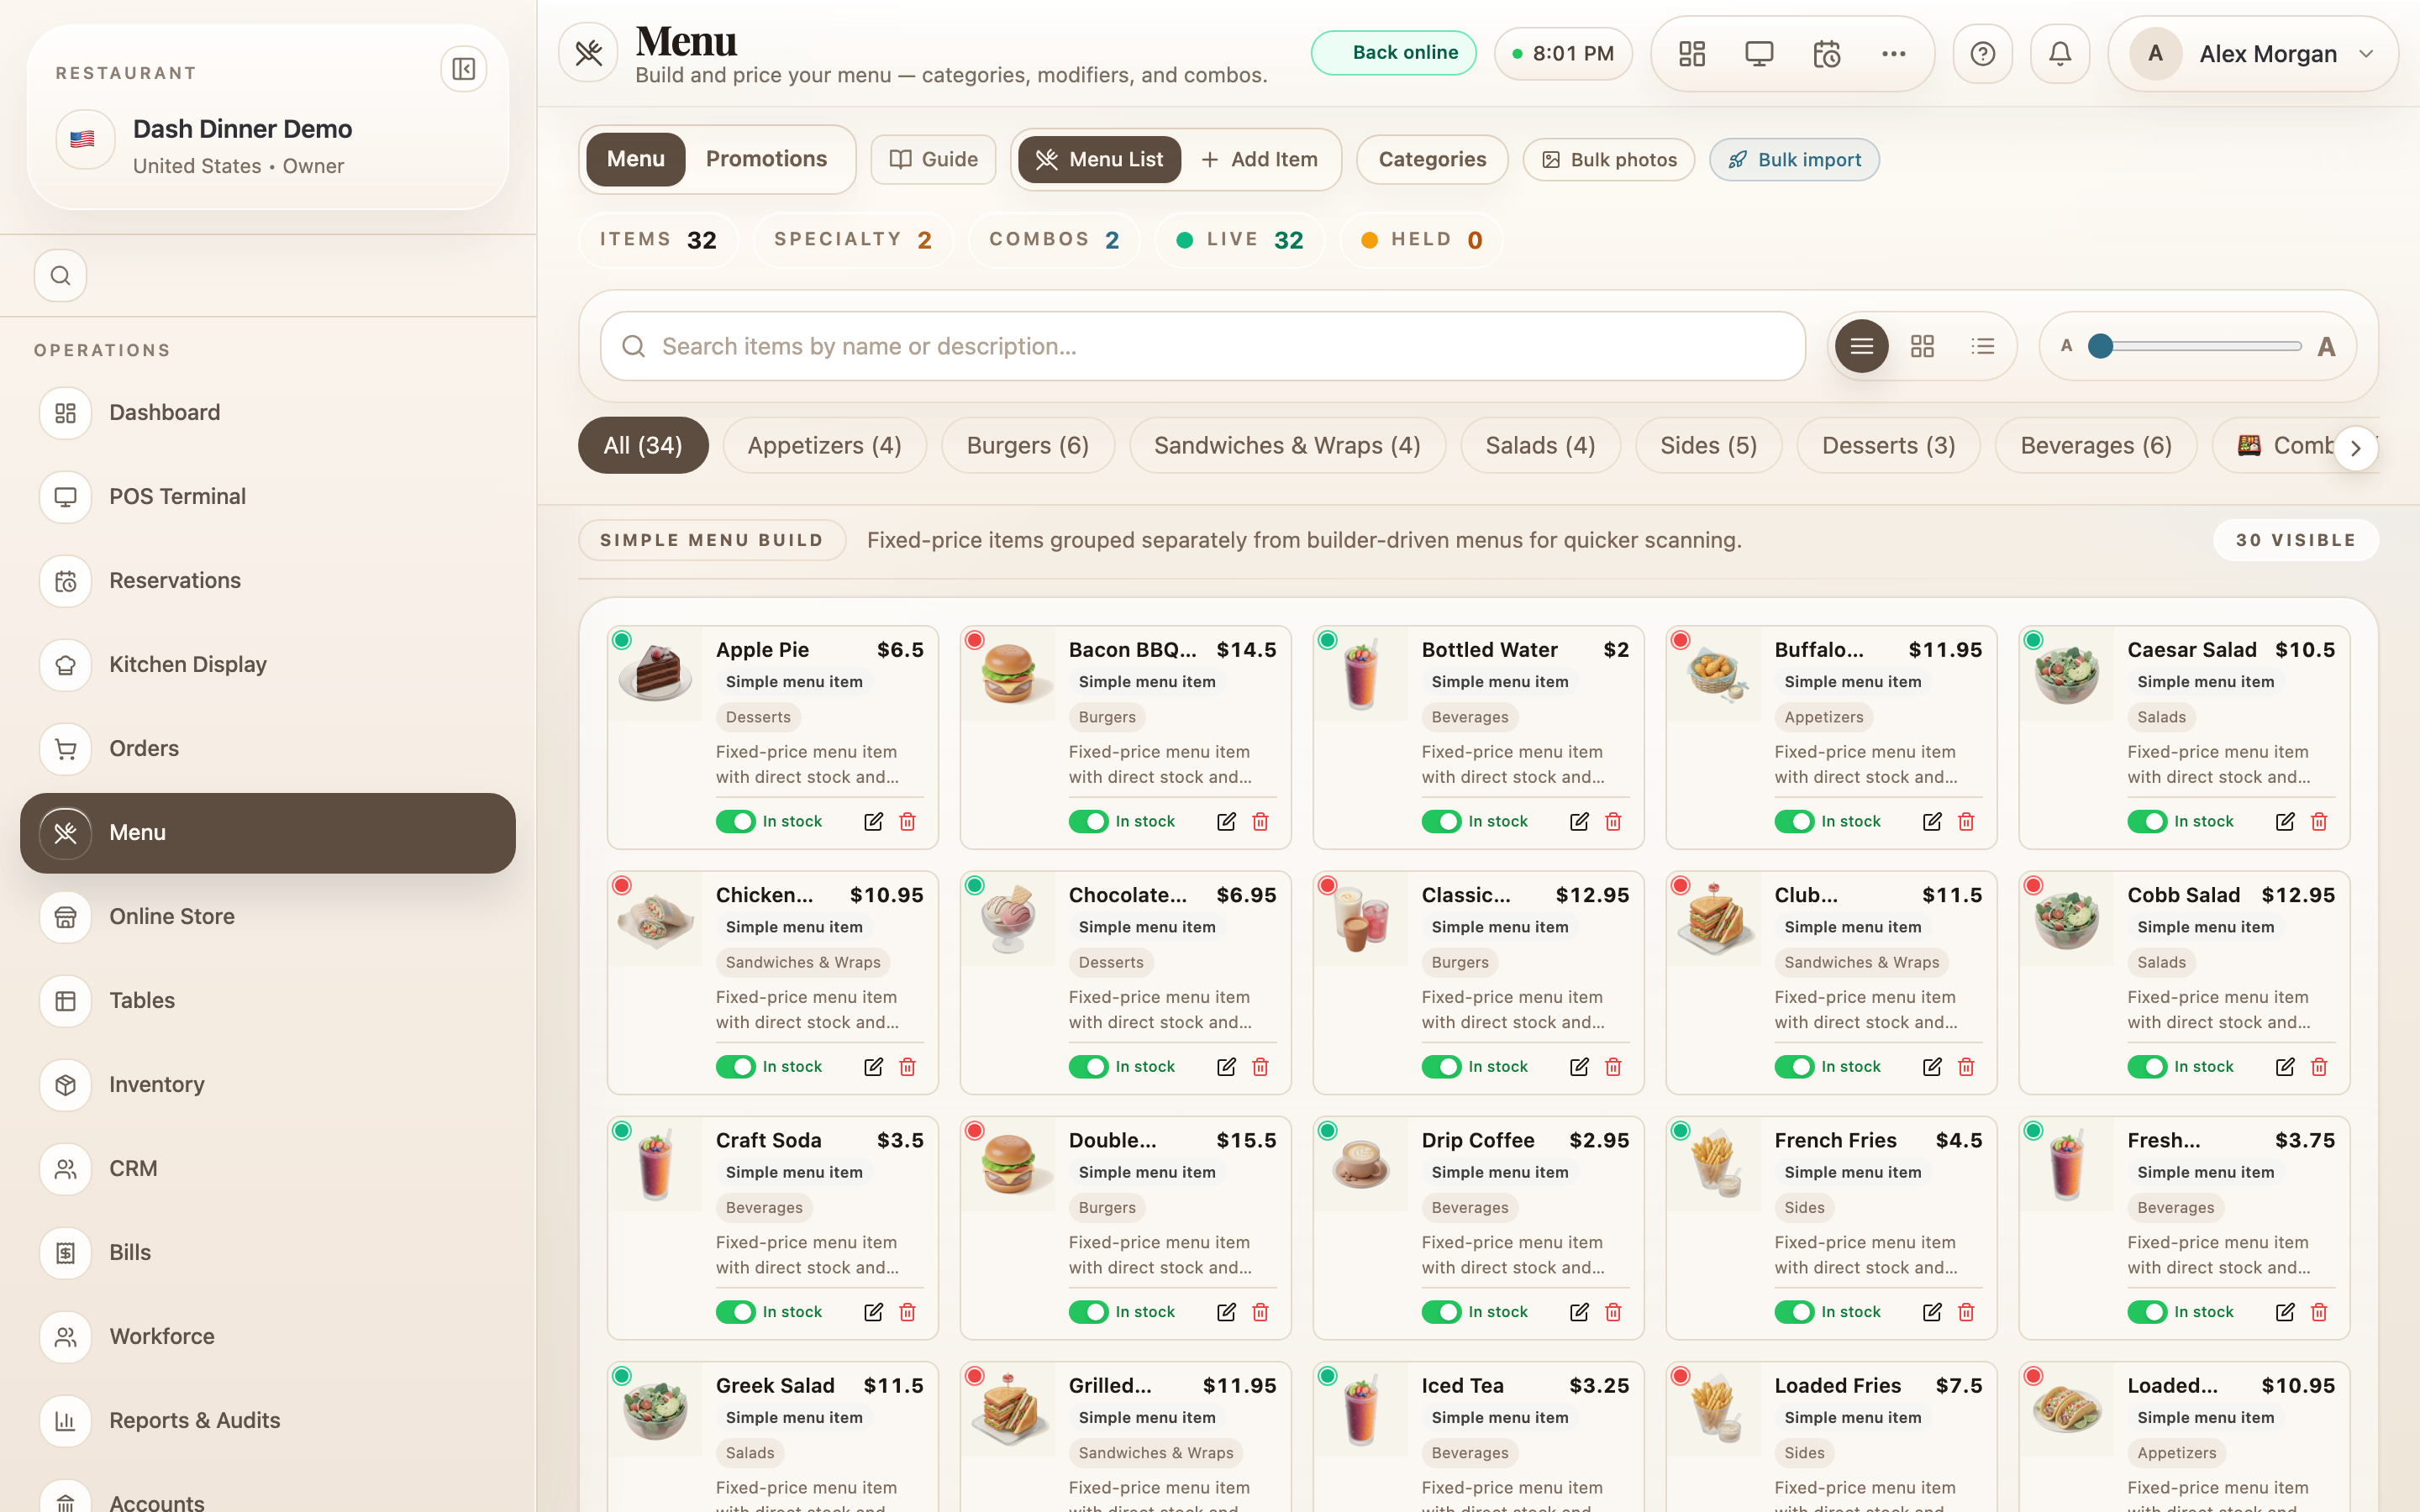
The toolbar
Across the top you'll find how you manage the menu:
- Menu List / Add Item — switch between browsing your items and adding a new one. The list badge shows how many items are currently held (off the menu).
- Categories — open the category manager (below).
- Bulk photos — add photos to many items at once.
- Bulk import — build out a menu quickly from the Quick Setup.
- Stat chips — a running count of Items, Specialty, Combos, Live, and Held.
Categories
Categories are the sections your menu is grouped into (Starters, Mains, Drinks…).
- Choose Categories.
- Type a name in New category name and choose Add.
- Optionally set a Default station: so every item in the category is routed to that kitchen station unless an item overrides it.
A category that still has items in it can't be deleted — move or remove its items first.
Finding items quickly
- Category chips run above the list: All, one per category with its count, and 🍱 Combos (which opens the combo builder).
- Search with "Search items by name or description…".
- View modes — switch between Compact, Grid, and List to suit how you like to scan.
Taking an item on or off the menu
Each item in the list has an availability switch: it reads In Stock (green) when guests can order it, or Off when it's held. Tapping it takes the item on or off the menu instantly — the quickest way to 86 a sold-out dish without editing it.
Item badges
Items can carry badges that guests and staff see, set when you add or edit the item: 🏆 Best Seller, ⭐ Suggest at checkout, 🔗 Combo eligible, a veg/non-veg dot, spice level, 🥦 Vegan, and 🌾 Gluten-Free.